Many people interested in composting keep a compost pile in their yard for use in their garden, adding such things as leaves and kitchen waste. But what if that pile is far away from your front door, you’re composting at an office or organization, or it’s bad weather and you don’t want to go outside? Kitchen composters are the answer, and we have many options.
For $20-$50, you could buy a ready-made model built out of plastic or stainless steel, which incorporates a charcoal filter to eliminate odors. A key problem with kitchen composters is that they tend to smell, and can attract fruit flies and other household pests. This can make some members of the family decide that composting is not worth the discomfort or effort. With the right design, however, these shouldn’t be problems, and a kitchen composter saves you from making multiple trips per day to your compost pile.

Courtesy photos
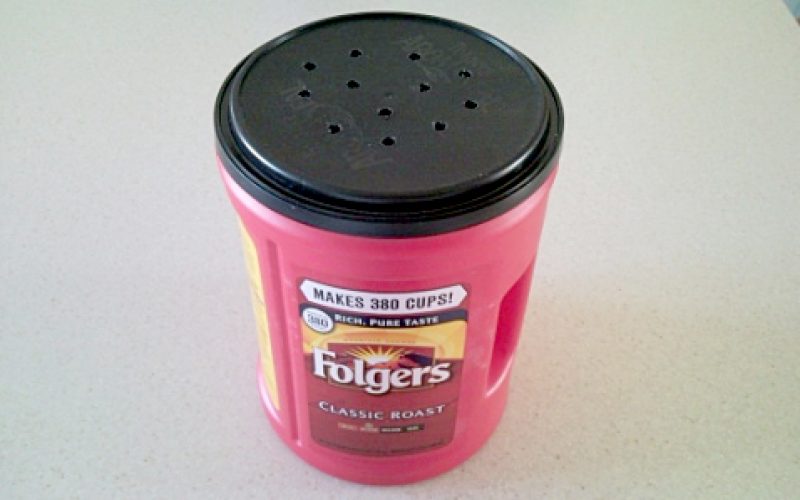
Step 1: Find a cylindrical container, such as a coffee can, and drill holes into the lid.
To save money, you can build your own kitchen composter that fits under the kitchen counter! Depending on your needs, you can reuse an old coffee can or a plastic storage bucket which is much larger. For the coffee can method, some people just throw their kitchen waste into the can and then dump it outside later, but if you drill holes into the plastic lid and glue a charcoal filter to it (such as the kind used for cat litter boxes) this will help. Note that these filters need replacing every few months, but can be bought at pet stores for just a couple of bucks. The filters need to cover the holes in the lid to keep flies out and prevent attracting them in the first place.
The larger plastic bucket model is basically the same idea: drill holes, attach charcoal filter, and you’ve got a compost bucket that fits under your kitchen sink! Just make sure you have an outdoor pile or rotating bin to dump your kitchen compost every few days.

Step 2: Apply a charcoal filter to the circumference of the lid to block out the smells of the compost.
Composting is easy, earth-friendly, and can save you money by producing (for free!) rich garden soil that reduces your need to buy fertilizers and cut down on trash that goes to a landfill. Just remember that you need “browns for carbon, greens for nitrogen, air for organisms, and water for moisture,” says the US Environmental Protection Agency. “Greens” include vegetables, fruits, tea bags, hair, coffee grounds, grass clippings and chicken or rabbit manure, to name a few. “Browns” include rags, leaves, wood chips, newspaper, sawdust, lint, eggshells, or fireplace ashes. Try to balance green with brown ingredients to achieve an optimal pile.
Absolutely DO NOT include these things in your pile: metal, glass, dairy or meat products, pet waste, chemicals, coal, treated wood or “firestarter” logs. For more tips, visit DIYNatural.com and search for kitchen compost bucket instructions.
Ripples is an emerging online educational center inspired by a holistic approach to making a difference. Follow our journey to live sustainably and make ripples with our lifestyle at: www.RipplesBlog.org.


